 ColonyCat
Your public page
Every rescue on ColonyCat gets a public web page at yourgroup.colonycat.org. By default it's barebones, just enough for a neighbor to find you and ask to volunteer or get in touch. You can customize how much shows by going to your Organization profile.
This chapter walks through publishing the page, picking what to show, and getting listed in the public directory.
What you're about to do
- Open Organization profile → Edit profile and scroll to Public page.
- Add a tagline, a short description, and contact info.
- Optionally upload a logo and decide what forms to show.
- Preview your page, then check that it shows up in the public directory.
Step 1: Find the public page settings
Click your rescue's name (top right). On the Organization page, click Edit profile. Scroll down to the Public page section.
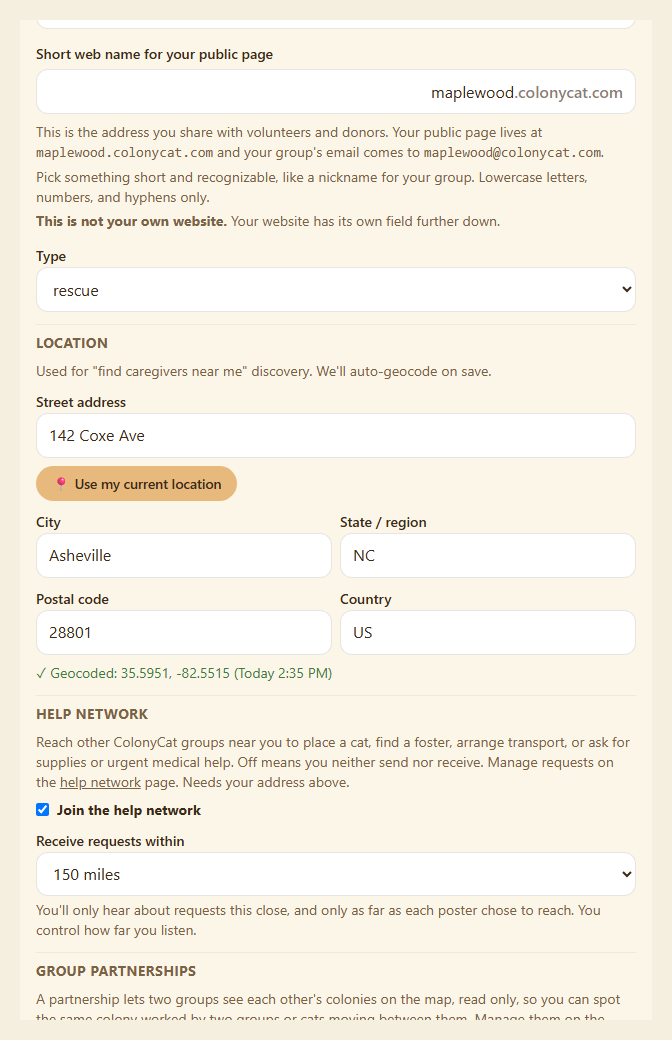
The first toggle is List us in the public directory. When this is on, your rescue appears at colonycat.org/directory where anyone searching for a TNR group in their area can find you. When off, your page still works (anyone with the URL can visit), but you don't surface in searches.
For a brand-new rescue you might want to leave this off until you have your page polished. Flip it on whenever you're ready.
Step 2: What visitors see
Below the toggle is a section where you fill in content. Here are the fields:
Tagline. One short sentence under your rescue's name. Example: "Trap-neuter-return for community cats in Thomasville, GA." Keep it under a hundred characters.
About us. A paragraph or two for the body. Tell people what you do, where you work, and how they can help. This supports plain markdown if you want bold or links, see Chapter 11 for a markdown cheat sheet.
Contact email. What email address to show on the public page so visitors can reach you. Leave blank to hide it.
Phone (optional). Shown on the public page so people can call.
Step 3: Social links and donate/wishlist
Scroll down to the Socials section. Add your Facebook, Instagram, website, and shop URLs. The shop is for a merch store or supply wishlist. These render as a row of icons on your public page, in this order: Facebook, Instagram, website (🌐), shop (🛒), wishlist (🎁), and donate (❤).
Donate. A direct link to your donation page (PayPal, Donorbox, Stripe link, your own page). When you add a donate URL, a "Support our work" card appears on your public page with a Donate button.
Donate message. The line shown in the "Support our work" card. Edit it to fit your group, or leave the default. This only appears if you've set a Donate link.
Wishlist. Link to your supplies wishlist (Amazon, Chewy, etc.) so supporters can buy what you need. Shows as a 🎁 gift icon alongside your other socials.
Leave any of these blank to hide that icon.
Step 4: Logo and brand
Click Upload logo to add your rescue's logo. PNG, JPG, or WebP. Square works best. The file gets resized automatically. The logo shows on your public page and in the directory listing.
No logo? Skip it. The default ColonyCat icon will be used instead, which is fine for a brand-new rescue.
Step 5: Request access form
If your plan is Core or higher, you can offer a request-access form on your public page so visitors can ask to volunteer.
Show "request access" form on public page toggle. When on, visitors fill in their name, email, and a message about how they'd like to help. That comes to you as a pending access request on your Organization page so you can approve, reject, or review it. When off, only a Sign in button shows.
"Request access" button text. Customize the button label. Try "Volunteer to help", "Join us", or "Sign up to help feed". Leave blank for the default ("Request access").
"Request access" intro text. A few sentences to welcome visitors and explain what you're looking for. Leave blank for the default.
(Free plan: the form is not available. Paid plans: it's optional and you control it. If you're at your seat cap, the form hides automatically.)
Step 6: Emergency report form
Accept emergency reports from anonymous visitors toggle. When on, your public page shows a "🚨 Report a cat" button anyone can use to send you a report (injured, sick, pregnant, found kittens, new colony). Each submission requires name, email, and a Turnstile check, and is rate-limited per IP. Reports land in your reports inbox with a "Public" badge.
Report thank-you message. The message visitors see right after they submit a public report. Edit this to fit your group, or leave the default. Your Donate and Wishlist links (from above) appear underneath it automatically, so supporters can give right after they reach out.
Step 7: Logo and brand
Step 8: Choose what to show
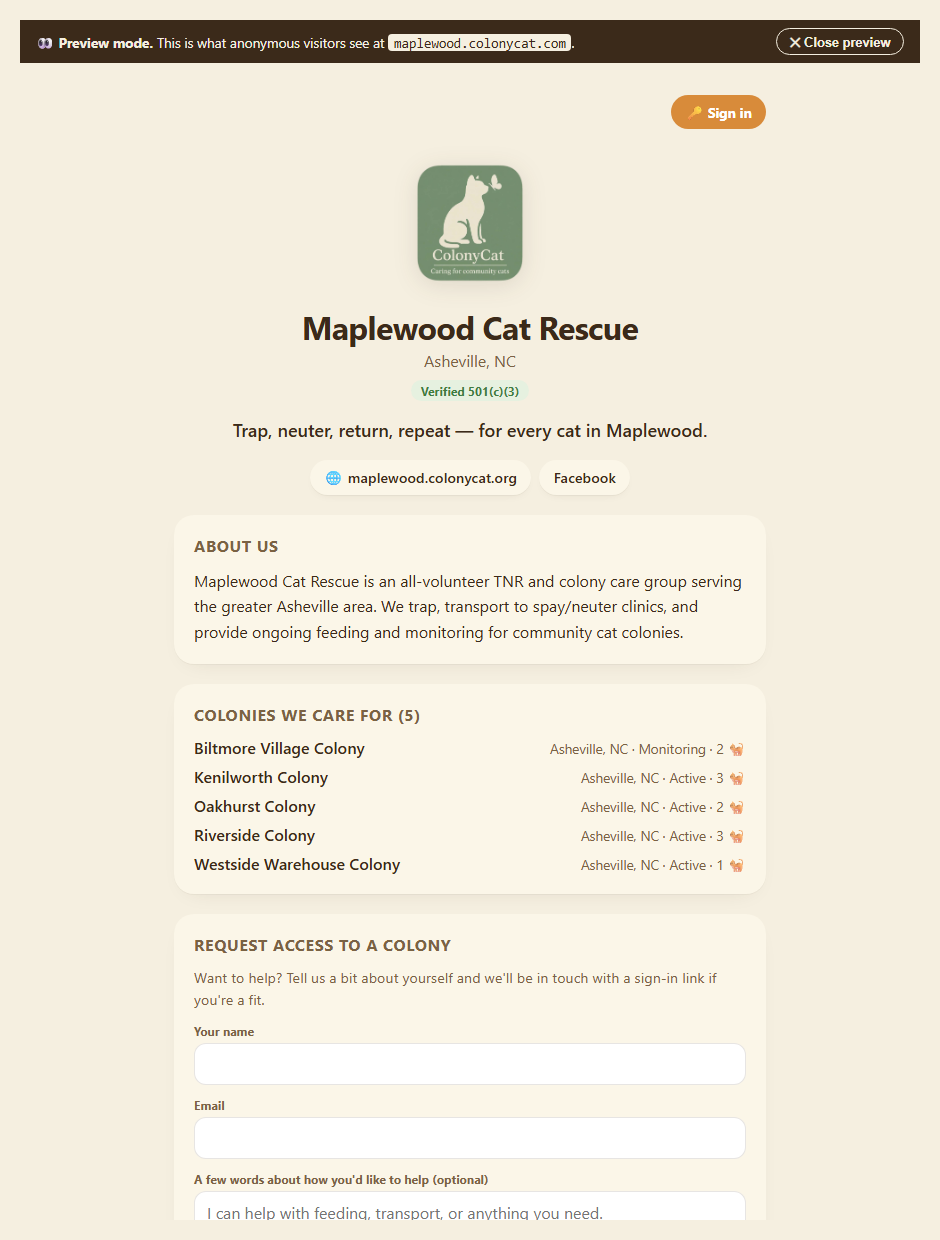
Scroll back up and click 👀 Preview public page → (next to your slug) to see what it looks like before you publish it.
Step 9: Terms and privacy addendums
ColonyCat has its own Terms and Privacy Policy that govern using the service itself. If you want to add a paragraph specific to your rescue (say, what you do with the email address someone fills in on the volunteer form), there's a Terms addendum and Privacy addendum field. Whatever you put there shows up below the standard ColonyCat terms when someone visits yourgroup.colonycat.org/tos or /privacy.
You don't need to fill these in. Most rescues don't.
Step 10: Featured directory listing and partnerships
If you turned on List us in the public directory, your rescue appears at colonycat.org/directory as a card with your logo, tagline, and a "Visit" button to your public page.
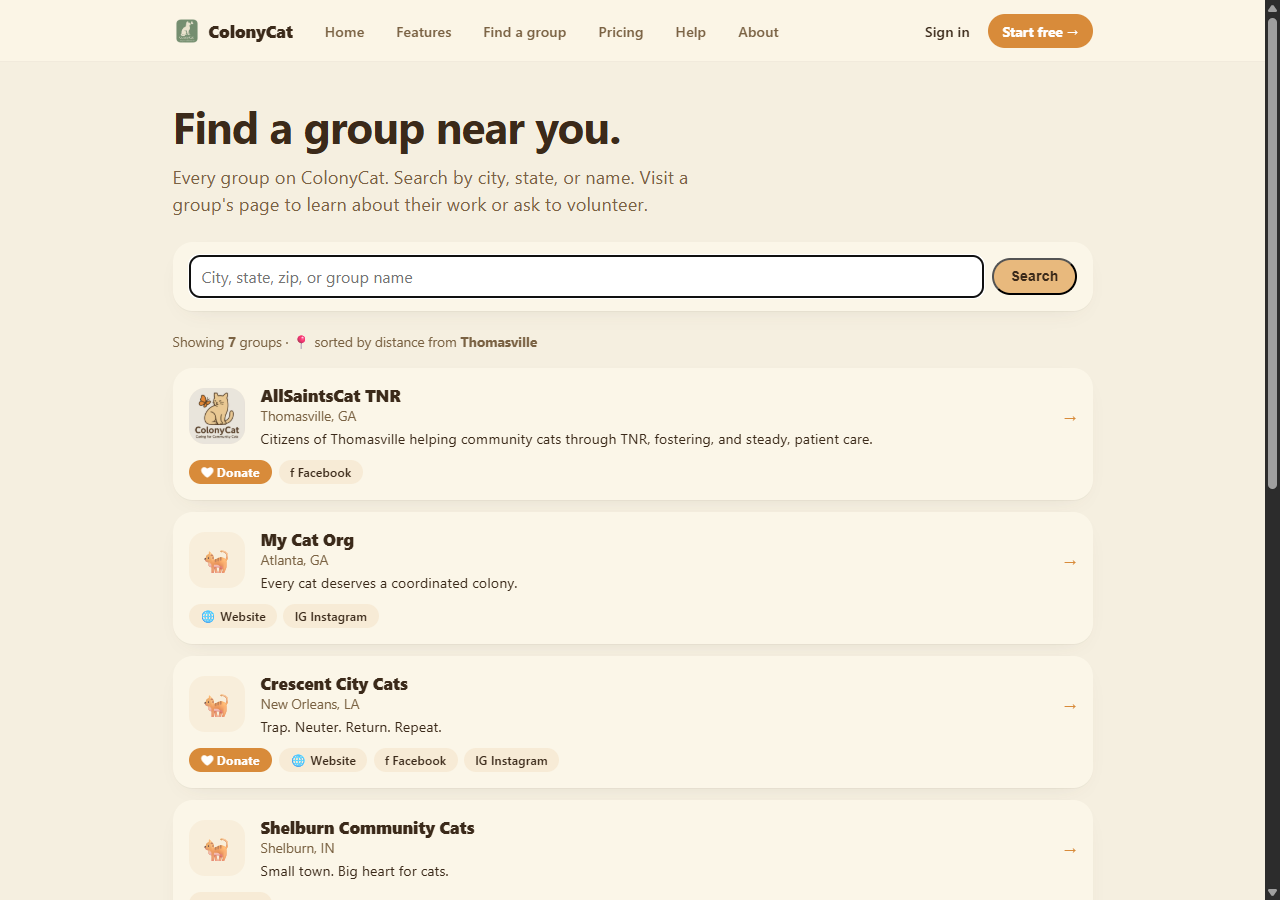
Visitors search by city, state, or ZIP. Cards from rescues nearest the visitor come up first.
You can also upgrade your directory listing to Featured, which pins your rescue to the top of the directory for visitors within 200 miles. Featured listings cost $10/month, on top of any plan (including Free). See Chapter 9 for details. (While billing is paused during the beta, featured listing upgrades are temporarily unavailable.)
About this page: Two other toggles on this same Edit profile page control partnerships (Chapter 16) and the Help Network (Chapter 17). All three together make up the parts of your profile that the public can see.
Where you are now
- Your rescue has a public page at yourgroup.colonycat.org.
- You've decided what shows there and what doesn't.
- You're either in the directory or you've chosen to stay private.
In Chapter 9 we cover billing, plans, what they include, and how to subscribe.
A few sanity-savers
- Colony names show, addresses never do. Your public page lists the colonies you care for by name, with a general area and a cat count ("Riverside Bridge, Thomasville, 6 🐈"). Street addresses and individual cat names are never shown. Want a particular site left off the public list entirely? Flip its Keep this colony private toggle (Chapter 2).
- Volunteer form requests are queueable. When someone fills it in, they show up on your Requests page (linked from Organization). You can approve to grant them OrgUser access, reject to send a polite no, or just let them sit while you think.
- Public page URL doesn't change if you rename your rescue. Renaming changes the displayed name but the web address stays, until you change the "web address" field in Edit profile. If you rename and change the web address, you'll lose any old links people had.
- No publish toggle anymore. Old behavior was that you could turn the public page on or off entirely. We took that out, every rescue's page is always reachable, you just choose whether to be in the directory and what's on the page.
→ Next: Chapter 9: Billing and plans